What are dev containers? Quoting the site https://containers.dev/, “A development container (or dev container for short) allows you to use a container as a full-featured development environment. It can be used to run an application, to separate tools, libraries, or runtimes needed for working with a codebase, and to aid in continuous integration and testing. Dev containers can be run locally or remotely, in a private or public cloud, in a variety of supporting tools and editors.”
How will my workflows start to change? Until now, every technology, every programming language, old or new, that I wanted to use to finish an old project, start a new one or simply learn something new, required me to install languages, runtimes, development environments, extensions and so on on my machine, with the result that it became increasingly overloaded.
I have recently started to explore a new (to me at least) programming language, Rust. Initially, for the first few exercises, I created a virtual machine on Azure and installed all the necessary tools, from the compiler to other tools, on it via https://rustup.rs/. Of course, this approach required me to connect to the virtual machine remotely, which of course requires the availability of an Internet connection.
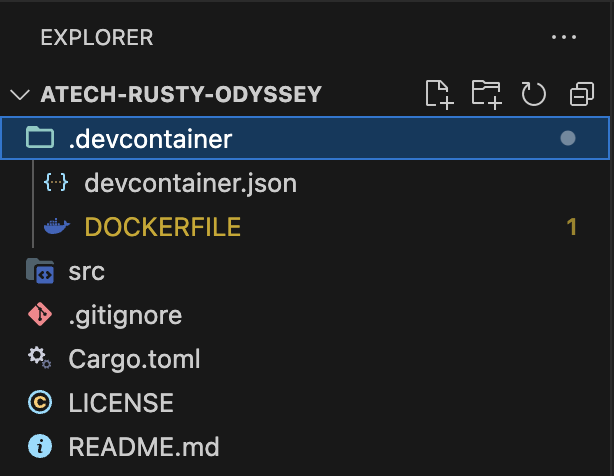
How does this scenario change with dev containers? The example is in atech-rusty-odyssey, my new project that will host exercises and experiments accompanying this journey.

The two files in the .devcontainer folder do the magic
1. devcontainer.json
This json file is used to configure the development environment.
{
	"name": "Rust",
	"build": {
		"dockerfile": "Dockerfile",
		"context": "."
	},
	"remoteUser": "vscode",
	"customizations": {
		"vscode": {
			"extensions": [
				"rust-lang.rust-analyzer",
				"mhutchie.git-graph",
				"TabNine.tabnine-vscode",
				"humao.rest-client",
				"equinusocio.vsc-material-theme-icons"
			],
			"settings": {
				"terminal.integrated.defaultProfile.linux": "zsh",
				"terminal.integrated.profiles.linux": {
					"bash": {
						"path": "bash",
						"icon": "terminal-bash"
					},
					"zsh": {
						"path": "zsh"
					},
					"fish": {
						"path": "fish"
					},
					"tmux": {
						"path": "tmux",
						"icon": "terminal-tmux"
					},
					"pwsh": {
						"path": "pwsh",
						"icon": "terminal-powershell"
					}
				}
			}
		}
	}
}
Let’s explain the main sections which appear in the example above:
- name: contains a friendly name of the dev container;
- build: defines how the development container is built:
- dockerfile: specifies the path to the Dockerfile that will be used to build the container;
- context: defines the build context, usually the folder containing the Dockerfile;
- remoteUser: specifies the user that will be used when connecting to the container;
- customizations: This section allows you to tailor the development environment to the specific needs of the domain. In the example above, the vscode editor is customised with a number of extensions, and the integrated terminal is set up to use zsh as the default shell.
2. DOCKERFILE
The DOCKERFILE handles the second part of the job. Although customizing this file is not mandatory, it provides the opportunity to incorporate features like selecting your preferred Linux distribution, customizing the shell, and precisely choosing the tools required to complete the job. This is certainly a valuable bonus.
# Use the latest stable version of Debian
FROM debian:stable

# Create the vscode user
RUN useradd -ms /bin/bash vscode

# Update the package list and install any necessary packages
RUN apt-get update && apt-get install -y \
    curl \
    build-essential \
    # Add any packages you need here
    && apt-get clean \
    && rm -rf /var/lib/apt/lists/*

# Install Zsh and Oh My Zsh
RUN apt-get update && apt-get install -y zsh wget git \
    && sh -c "$(wget -O- https://raw.githubusercontent.com/ohmyzsh/ohmyzsh/master/tools/install.sh)" \
    && chsh -s $(which zsh) \

    && apt-get install -y locales locales-all \
    && update-locale

# Set up Oh My Zsh with a theme and plugins
RUN rm -rf /home/vscode/.oh-my-zsh \
    && git clone https://github.com/powerline/fonts.git \
    && cd fonts \
    && ./install.sh \
    && cd .. && rm -rf fonts \
    && git clone https://github.com/ohmyzsh/ohmyzsh.git /home/vscode/.oh-my-zsh \
    && cp /home/vscode/.oh-my-zsh/templates/zshrc.zsh-template /home/vscode/.zshrc \
    && sed -i 's/ZSH_THEME="robbyrussell"/ZSH_THEME="agnoster"/' /home/vscode/.zshrc \
    && git clone https://github.com/zsh-users/zsh-syntax-highlighting.git ${ZSH_CUSTOM:-/home/vscode/.oh-my-zsh/custom}/plugins/zsh-syntax-highlighting \
    && git clone https://github.com/zsh-users/zsh-autosuggestions ${ZSH_CUSTOM:-/home/vscode/.oh-my-zsh/custom}/plugins/zsh-autosuggestions \
    && sed -i 's/plugins=(git)/plugins=(git zsh-syntax-highlighting zsh-autosuggestions)/' /home/vscode/.zshrc

# Switch to vscode user
USER vscode

# Download and install Rust using rustup
RUN curl --proto '=https' --tlsv1.2 -sSf https://sh.rustup.rs | sh -s -- -y

# Set the environment variables for Rust
ENV PATH="/home/vscode/.cargo/bin:${PATH}"

# Verify the installation
RUN /home/vscode/.cargo/bin/rustc --version && /home/vscode/.cargo/bin/cargo --version

# Set the default shell to Zsh
SHELL ["/usr/bin/zsh", "-c"]

# Set the working directory
WORKDIR /workspace

# Specify the command to run the application
CMD ["zsh"]
The comments in the file should be enough to clarify what is happening, but let’s summarize in a few points.
- The first block takes care of creating the vscode user set in the previous file;
- Then we go on to install zsh and some modules that will customize its theme and behavior
- Finally, we move on to the installation of the rust toolchain via rustup
Conclusions
In this note we have seen how it is possible to create a whole dedicated development environment, in just a few steps and with the only requirement that you have a container management tool, such as docker or podman available on your computer, without the need to install anything on the host, which, in this way, will always remain clean and efficient.
Enjoy, ![]()